Removing the White Background From an Image and Colorizing
Before & After
All keyboard commands are for Mackintosh, so your menu/keyboard commands may be different depending on your platform and Adobe version.
Install the delicious freebie plug-in:
First close your Photoshop application if it is open.
Yum! Download the freebie Flaming Pear "Ghost" filter from the following website. Scroll down to find the Ghost Filter > "Free Plugins", choose your operating platform, download it, and follow Flaming Pear's instructions for your particular computer/operating system. (In my case I just dropped it into my Plug-Ins folder).
http://www.flamingpear.com/download.html
Open Photoshop. If it was left open during the install, you will need to close it then re-open it. Go up to your Filters menu, and see if it is listed under Filters > Flaming Pear > Ghost. If not, restart your computer and re-open PS. Have a file you'd like to work on opened to work alongside.
Using the Ghost Filter:
Here is a sample file of an old cartouche that I scanned and opened in Photoshop. It needs to be cleaned up and given more contrast so the filter can work better and not pick up any grey values. The better your image, the better the filter can work.
1. Open up your image in Photoshop. Go to your file's Layers Palette, double-click on the image's "Background" title, then click "OK" to make it an active (adjustable) layer:
Double-click on layer "Background" title to release layer for editing.
2. Add a new layer, fill it with white and drag it to the bottom of the stack. (You can toss it later to make a transparent file such as a Gif, but add it for now it so you can see your image more clearly as you make any needed adjustments):
Use the Create a New Layer button...
The image needs to be optimized a bit so the filter can do it's work. I'm going to make an adjustment to the Levels to bump up the contrast and get rid of any grey areas.
3. Go up to Image > Adjustments > Levels and move the sliders indicated by the arrows in toward each other to eliminate the grey values:
Adjusting the Levels. Zooming in will help you see what's what!
Sweet! Notice how the greys disappear, the whites get whiter and the blacks get blacker. That's just what you want!
4. Now for the filter! Making sure you're back on the image layer, go up to your Filters Menu, find Flaming Pear, and click on the Ghost Filter. You will then see your image desaturate onto a transparent layer:
Below, the Ghost Filter has been applied and the white background turned off so you can see what a powerful filter this is. No white pixels to pick out!
5. In this case as the artwork is still rather faded, I'm going to pump it up by doubling the image layer so it's more solid. Use the keyboard command "Command J" a couple of times while on the image layer, or you can drag the image thumb down to the Create a New Layer button at the bottom of the Layers Palette. (If your image is a strong one, you can skip this step).
In this case I've created 1 additional copy. Do this as many times as you need to get the look you want:
See how this image is stronger than the one above it...
6. Combine the images (do not include the white background image!) by holding down the Shift key and clicking on each image thumbnail, then hit "Command E" (or Merge Layers from the Layers Palette drop down menu) to merge the layers:
Nice! Compare with original scan.
Looks much better! SAVE! (At this point I usually save this as a layered PS master file in case I need it for later).
Now it needs some color. We will now colorize it in one of two ways, with the Layer Style Palette or on a Locked Transparent Layer with Brush or Gradation:
Coloring using the Layer Style Palette:
1. Double-click on the image thumbnail on the Layers Palette to bring up the Layer Style window. Make sure the Preview button is checked and scroll down to check the Color Overlay button. It defaulted to a standard red in my case.
2. Choose your color by double-clicking on the (red) Blend Mode color box in the center of the Layer Style window:
I chose a celery green, clicked "OK" in the Select Overlay Color window, and "OK" again in the Layer Style window:
3. Add another layer to the top. Hold down the Shift key, select both layers, and then hit "Command E", in effect applying the effect and leaving the artwork on a transparent layer:
Yea!! My image is now the color I want on a pristine transparent background. This layer can be dragged into other photoshop files as is. It can also be saved as a very clean selection in the Photoshop Channels Palette. (Command + Click on layer thumbnail image > Select > Save Selection).
4. Save. At this point I toss the white layer and save the file as a Gif or PNG, making sure the transparency box is checked in subsequent windows.
Coloring using a Locked Transparent Layer with paint brush or gradation:
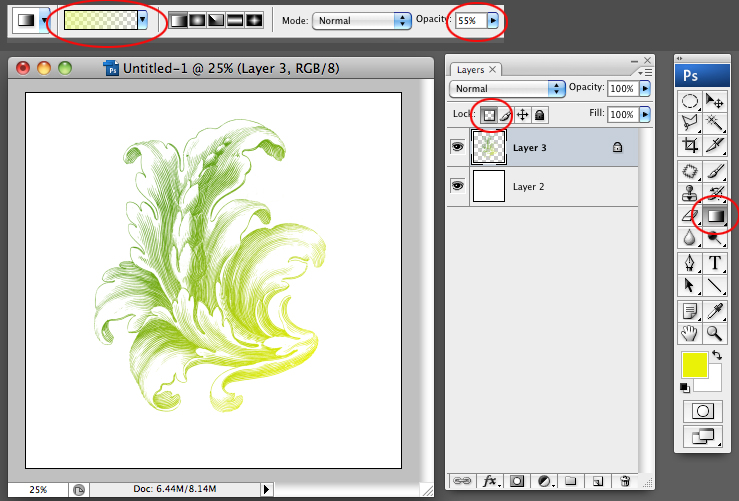
1. To paint areas with a brush (in this case I'm going to make the tips a bit yellow), check the transparency locking button on your Layers Palette:
In this case, I used a soft brush on a percentage for soft blending.
2. Select a brush tool and color you like and brush over the artwork layer.
3. Or select your gradation tool and colors you like, making sure to check the type of gradation tool you want:
Gradated corner to corner.
Below are a couple more ways you can use this tool:
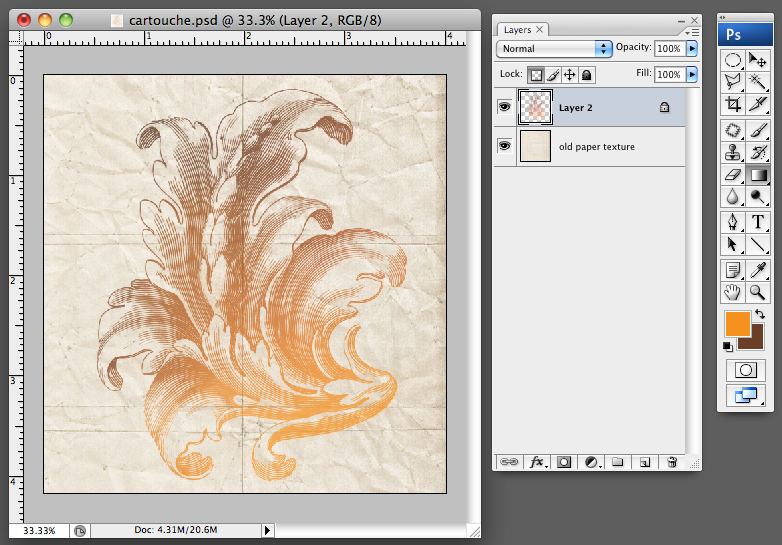
Grab an old textured paper file and put it on the bottom layer and shift the color.
Use it in conjunction with signage on your shop window.
Oh! One last tip: Learn your keyboard commands! Become a Power User by taking that fraction of a second to learn a command's keyboard equivalent for a tool or cutting and pasting, anything you find yourself using a lot. Just using it once or twice will seal it in your memory and become your best friend:
I hope you've found this tutorial useful and remember, if you've done this once or twice, it becomes second nature and takes no time at all. There are many ways to skin a cat...this is just mine. Many thanks to Flaming Pear.


